Tag Archive for: healthy

Staying Active

5 Tips to Stay Active and Avoid Injury in Your 50’s

I work with a lot of clients in their 50’s and beyond. Staying active over 50 is a big priority for them as they age. An injury can significantly derail this plan, especially as we age, since recovery just isn’t as easy.

Here are five of my top tips when speaking to folks over the age of 50 for staying active and mobile, avoid injuries, and continue doing everything they love:

1. Keep Moving

You’ll often hear me say: “You don’t get stiff because you get old, you get old because you get stiff”.One of the best ways to stay active and mobile as you age is to keep moving. Well what if you have something like arthritis? Remember that arthritis is normal. It happens to everyone as they age and it’s rarely a reason to stop doing your favorite activities.

In fact, research has shown that activities like running, when done consistently and with proper form, actually prevents knee arthritis. Arthritis worsens when you don’t move. And common “injuries” such as meniscal tears and bulging discs are more likely to occur in arthritic joints. But the more active you stay, the less likely you are to be impacted by ailments such as these, and the better your joints will feel. Happy joints will motivate you into staying active.

2. Maintain a Healthy Diet

Both osteoporosis and heart health become bigger concerns as we age, and what you eat can have a direct and positive influence. With osteoporosis, your risk of injury, especially from a fall, becomes greater. Greens like kale, spinach, and arugula are awesome for your bones, along with citrus fruits, fish, and nuts. These foods help your bones stay strong and durable.

According to Health magazine, “The risk of a heart attack climbs for men after age 45 and for women after age 55.” As you enter middle-age, increasing the presence of foods like unsalted nuts, unprocessed oatmeal, raisins, blueberries, and even dark chocolate (over 70% cacao) can help keep your heart healthy. Before making any drastic changes to your diet, especially if you’ve got comorbidities such as diabetes or kidney disease, you’ll want to check with your doctor or dietician. But otherwise, paying attention to your diet can have a big impact on how healthy you keep your heart and bones, which will motivate you in staying active and mobile.

3. Work on Your Balance

Balance is one of the first things to go as a person gets older, and it’s one of the most crucial factors in fall prevention. Slips and falls due to poor balance can lead to broken bones and fractures, which become more common and harder to recover from as you age. But if you’re intentional about improving your balance when you exercise, it’s not too late to improve it.

While there are many great balance-exercises you can do at home, I always recommend incorporating balance strategies with movement and activity. Because rarely do we fall when just standing still. Try standing on one leg when you brush your teeth, place one foot up on a stool when washing dishes, walk around on your toes and heels during commercials. These are really easy strategies to incorporate into your daily living. And of course, activities like walking regularly, Thai Chi and Yoga are also great to promote good balance – while also keeping you active.

4. Strengthen Your Core

Having a strong core is beneficial at any age, but especially as you get older. Strong abs, hips and buttocks (all part of your core) help you to sit and stand more upright, prevent back and neck pain, and will help you feel stronger and more confident in just about everything that you do.

One word of caution, however, when it comes to core training is to pay special attention to your form and posture. Ironic, right? Since core training is supposed to help those things… But I can’t tell you how often I see folks (especially over 50) begin a new core training program and then call us 4-6 weeks later because they’ve suddenly hurt their back.

If you’re over the age of 50 – and you haven’t exercised in a while – I highly recommend engaging the help of a qualified professional who can guide you through exercises that are appropriate for your fitness level as well as keep a close eye on your form and technique when crunching those abs and working those planks.

5. Educate Yourself

Knowledge is power, and lack of it, is one of the biggest reasons I see people decreasing their activity levels as they age and getting injured.

People think that ailments like arthritis, bulging discs, or a torn meniscus are reasons to decrease or cease certain activities. Not true. Most of the things I just mentioned are normal occurrences as we age, and having them show up on an Xray or MRI is not a reason to change something you’ve been successfully doing for years.

Staying active and mobile actually helps these problems. If you’ve got pain, that’s a different story.

Talk to an expert who can help you figure out what’s going on, so that you can quickly get back to your activities and not make your pain worse.

Dr. Carrie Jose, Physical Therapist and Pilates expert, owns CJ Physical Therapy & Pilates in Portsmouth and writes for Seacoast Media Group. To get in touch, email her at [email protected].

Active and Mobile

Five Easy Ways to Stay Active and Mobile this Thanksgiving

Thanksgiving is one of my favorite Holidays and it’s right around the corner. Rest and relaxation might be top of mind for you. But, it’s still important to stay active and mobile throughout the day. 

Our spine and joints don’t like to be sedentary for prolonged periods. And that’s especially true if you’ve got arthritis, back or knee pain.

You may not notice any pain while you’re sitting or relaxing, but you will pay for it the next day if you don’t find ways to keep moving.

So here are five very easy ways to help you stay active and mobile this Thanksgiving:

  1. Interrupt Your Sitting.

Our bodies were not designed to sit for prolonged periods, so getting up frequently is an easy way to not only incorporate movement throughout your day, but to help keep away back and knee stiffness. I recommend standing up at least once every 30 min.

This could be a fun assignment to give a young child. Make them accountable for watching the clock and remind you to stand up. This is quite possibly the easiest and most effective strategy to keep your knees, hips, and spine from getting painful and stiff throughout Turkey Day.

  1. Do a Turkey Trot.

Thanksgiving Turkey Trots are a popular event in most towns and it can be a really fun event for the whole family. Turkey Trots are typically 5K’s – or 3.2 miles. If you’re not able to sign up for an actual race, grab your friends and family and create your own Turkey Trot within your neighborhood.

If you can’t coordinate a time to do this in a group, take a virtual trot together and stay connected via your smartphone. Either way, whether you walk or jog, it will feel great to get your Thanksgiving Day started with lubricated joints and blood flowing. 

  1. Stretch During Commercials.

Whether it’s the Macy’s Day parade, football, or both – it’s easy to find yourself sitting for hours on a soft sofa or recliner. A very easy way to keep yourself from sitting or slouching too much and to incorporate some healthy movement into your day is to get up during commercials.

It’s the perfect opportunity to do a quick 2 min exercise or stretch.  It doesn’t have to be complicated. Choose from a quick set of squats, heel raises, planks, or back stretches. You can alternate through these during each commercial break and your body will thank you for it.

  1. Walk Your Dessert Off.

Just because you did that Turkey Trot in the morning doesn’t mean you have to be done for the day. Rather than feeling like you need to skip dessert – just plan to walk it off afterwards.

Walking is one of the best and most natural exercises you can do. And it gives you many of the same benefits of running (only slower).

Walking is very functional, and it’s good for your hips, back and knees. Since we tend to sit and bend so much during the day, walking is a very natural and active way to get some much needed lengthening and stretching into our bodies before we settle in for the evening. 

  1. Help With Cleaning Up.

Don’t be shamed into “just sit down and relax” because you’re a guest. Helping with clean-up (or set-up) is an easy and effective way to keep moving during your Thanksgiving Holiday.

Not only will your Thanksgiving host love you – but your body will too.

If you’re suffering from back problems, be careful bending and leaning over – especially if it’s repetitive – when you’re collecting or washing dishes. But otherwise, carrying heavy plates, moving chairs, and wiping down tables can burn quite a few calories and it’s good for your body.

There you have it – if you don’t want your Thanksgiving Day to be sedentary – you now have five easy ways to stay active and mobile.

I hope you have a wonderful Holiday and get to spend it with those you love most.

Dr. Carrie Jose, Physical Therapist and Pilates expert, owns CJ Physical Therapy & Pilates in Portsmouth and writes for Seacoast Media Group. To get in touch, or request a free copy of one of her guides to back, neck, knee, or shoulder pain, email her at [email protected].

How to Prevent Knee Pain When Hiking

Hiking is a popular way to stay active during the summer months – but it can also wreak havoc on your knees.

Personally, I love to hike. My pup (Bodie) and I are currently in the process of conquering the 48 4K footers of the White Mountains – and the very last thing I want is for knee pain to get in the way of that journey.

The good news is that there is quite a bit you can do to prevent knee pain when hiking. So when one of my readers asked this week – “How do I prevent knee pain when hiking?” – I couldn’t wait to answer it.

Here are 4 of my top tips to help you prevent knee pain when hiking.


1. Strengthen your hips and core

Your hips and core provide much needed support for your knee joint to function properly. The large bone in your thigh, called your femur, makes up your knee joint on the bottom, and your hip joint on the top. Your hip joint is connected to your pelvis, which houses major core muscles groups like your glutes.

Let’s say your glutes (part of your core) and hip muscles aren’t as strong as they could be. When you’re trying to climb up a large rock or steep trail, for example, your glutes and hip muscles are supposed to stabilize your pelvis so that your femur can easily extend your hip. When not strong enough, your pelvis will tilt to compensate – which impacts the alignment of your femur – and ultimately the alignment of your knee.

When I hike a 4k footer – I get in approximately 27,000 steps. If your knee is compensating for every one of those steps – it’s eventually going to hurt. If hiking is something you love to do, it’s critical that you strengthen your hips and core.

2. Keep your knees mobile

One of the biggest mistakes I see when it comes to knee problems is a lack of full mobility. Your knee shouldn’t just straighten, it should be able to hyperextend a little bit. When you bend your knee, you should be able to tolerate a full deep squat without any pain. These full end range movements are pretty essential to have when it comes to hiking. Your knee needs to be able to squat, pivot, and tolerate stress on those uneven trails. When you lack full mobility, it impacts your knee’s ability to tolerate these micro-stresses and over time – your knees will ache.

If you’ve got pain or stiffness in your knee in either direction of movement – it’s important to try and push that movement and work through it rather than avoid it – even if your knee seems painful at first. More often than not, the more you move your knee joint, the better it will feel. If that doesn’t happen – then you know it’s time to talk to an expert about it and have them take a closer look at your knee.

3. Work on your balance

Hiking can involve everything from uneven terrain, water crossings, and rock hopping. Good balance is essential for these activities and without it – your knees will suffer.

So how do you work on your balance?

Aside from the obvious (practicing balance exercises), it’s also important to look at a few other things – namely – the mobility of your toes, foot and ankle joints as well as the strength of your arch (plantar fascia). These structures all play a role in how well you’re going to be able to balance. You can do all the balancing exercises in the world, but if you’ve got faulty mobility in your ankle, for example, or a flat, weakened arch – balance is always going to be really difficult for you.

Perform regular stretching of your ankle and calf muscles, Be sure to move those toes – can you lift your big toe up by itself when you’re standing? And use a small ball to regularly massage the arch of your foot to keep it flexible. These small activities can play a huge role in helping you to be able to balance with more ease – especially on the trials.

4. Use Trekking Poles

Even if you implement every single tip I mentioned above, depending on your overall level of fitness, and the condition of your knees prior to when you decided to get into hiking, you could still have some knee pain despite doing “everything right”.

Trekking poles can be a real life saver – or should I say knee-saver.

They help take away some of the stress from your knees and lower legs – especially on really long hikes and technically challenging trails. Plus, if you’re carrying a backpack, trekking poles help to disperse that extra weight away from your knees and into your arms. And added bonus – hiking with poles gives your arms a little extra workout at the same time and keeps your hands and fingers from getting puffy on those extra hot and humid days.

If you love hiking as much as Bodie and I do – then I know the last thing you want is for knee pain to keep you from hiking. I hope these tips help you to ease any knee pain you might currently have as well as prevent future knee pain on the trails.

Do you love to hike but knee pain is currently getting in the way? CLICK HERE to talk to one of our specialists. 

They’ll let you know if we can help – and if you’re a good fit for what we do – they’ll get you on our schedule right away.

Dr. Carrie Jose, Physical Therapist and Pilates expert, owns CJ Physical Therapy & Pilates in Portsmouth and writes for Seacoast Media Group. To request a free copy of her Knee Pain Free Report CLICK HERE  or to get in touch, email her at [email protected].

Physical Therapist

Piriformis syndrome and Sciatica – PT not working?

I recently polled my readers regarding their most important concerns when it comes to their musculoskeletal health. In other words, what questions were they desperately seeking answers for related to back, neck, knee, hip, shoulder, or ankle pain?

Here is a great question I received from John:

“I’m getting Physical Therapy for lower back pain and sciatica that is said to be from my piriformis. My PT treatment has consisted of various exercises and some massage. Eight sessions in and no change at all. I’m still having pain when sitting or walking a distance. What now?  Do I need an Ultrasound or MRI to see if there is any damage or tear to my piriformis?”

First, John, I’m so sorry to hear you’re still having pain and not seeing any change after a good amount of physical therapy. When it comes to back pain and sciatica, it’s critical that you receive a thorough mechanical and movement examination by your PT before any treatment begins. This should involve repeated testing and retesting of movement and range of motion to determine:

1) where your pain is coming from and

2) what movement patterns trigger and relieve your symptoms

Without this first critical step, you risk missing the root cause of your pain and treating just symptoms. This type of testing is also essential to determine if physical therapy can even resolve your problem. If your physical therapist simply read the prescription from your doctor and dove into generalized treatment protocols – there’s your first problem right there – and it could explain why after 8 sessions you’re seeing no change in your condition.

In your case, it sounds like the massage is intended to treat your symptoms – perhaps your tight, tender piriformis that is believed to be causing your back pain and sciatica. This is perfectly appropriate, however, it’s important to incorporate targeted, therapeutic movement to make the most of what your manual therapy (massage) just did.

In other words, movement is the real “medicine”. Manual therapy is designed to enhance blood flow to and prepare your soft tissue (muscles and ligaments) to be better equipped to tolerate and perform the movement/exercise that is going to have a long-lasting effect.

If the massage and exercise are not done in a specific and targeted way – they aren’t going to have their intended effect. It’s possible this could be happening to you. If you’re not totally clear on what your exercise is for and what the intended effect is – chances are high your exercises haven’t been prescribed to you properly. If you suspect this to be the case, it’s worth your while to try for a different, perhaps more specialized physical therapist before you go jumping into diagnostic tests that could lead you down a rabbit hole of unnecessary procedures or surgery.

Now, let’s assume for a moment that you did receive targeted and high-quality physical therapy treatment and it’s simply not working. This does happen from time to time – but it should only be approximately 20% of the time for the majority of musculoskeletal problems such as back pain and sciatica. And in my opinion, it should be caught well before 8 sessions. In my experience, it takes about 5-6 (quality) PT sessions to figure out if a problem can be resolved with movement and natural means. If not, then a referral to another specialty is necessary.

Are you there yet? I can’t be certain.

But to answer your question about whether or not you need an MRI or Ultrasound… 

If quality, targeted physical therapy has been truly exhausted then yes – either of these diagnostic tests would be the next step in providing valuable information as to what more might be going on.

Ultrasound is a non-invasive diagnostic tool designed to visualize both organs and soft tissue. It could be a good option for examining your piriformis if you are certain that is where your problem is coming from. But piriformis syndrome only accounts for about 30% of all sciatica cases. And typically a tear in your piriformis will not cause pain to radiate down your leg. Most of the time, sciatica is caused by nerve impingement occuring in your lumbar spine (low back). If conservative treatment, like physical therapy, has been fully explored – an MRI could be helpful to see how badly a nerve is being pinched or irritated and whether or not a procedure or surgery is warranted. But in general, the research has shown time and time again that spine surgery is really only successful when you’ve got serious and progressive neurological deficits and symptoms.

In other words, you might have symptoms like foot drop, and your leg is getting weaker and numb by the minute. Otherwise, physical therapy – although it may be slower to work – has equal if not better results compared to surgery and it’s a lot safer.

The caveat, however, is you need to find a good physical therapist.

I hope this helps answer your question. Most importantly – don’t give up hope!

For the next few months I’ll be answering questions like these each week in my articles. If you’ve got your own questions regarding musculoskeletal aches or pains that you want answers for, reach out via the information below.

Local to Portsmouth and feeling frustrated with your current physical therapy treatment just like John?

Reach out – we’d be happy to provide a second opinion. CLICK HERE to request a Free Discovery call with one of my specialists.

Dr. Carrie Jose, Physical Therapist and Pilates expert, owns CJ Physical Therapy & Pilates in Portsmouth and writes for Seacoast Media Group. To request a free copy of her guide to back pain CLICK HERE or to get in touch, email her at [email protected].

Will a Cortisone Shot Help Your Nagging Shoulder Pain?

Will a Cortisone Shot Help Your Nagging Shoulder Pain?

Nagging pain in your shoulder can be extremely annoying. But when it starts to interfere with things you love to do – you can’t help but wonder – Will a Cortisone Shot Help Your Nagging Shoulder Pain?

When you’ve got dull, nagging shoulder pain that just won’t go away, cortisone shots suddenly seem very attractive. They’re quick, easy, and seemingly harmless – right? Not so fast.

Just because cortisone shots are extremely routine and popular – it doesn’t mean they are the best or right thing to do.

Cortisone shots are typically administered to reduce localized inflammation inside a joint or tendon. In shoulders, it’s very common to use this procedure to reduce pain from arthritis, bursitis, rotator cuff tendonitis, and even frozen shoulders. When inflammation is confirmed to be the root source of your shoulder problem, and it’s not going away with medication, on its own, or with physical therapy – a cortisone shot may be the right course of action.

But what if inflammation is not the root source of your problem? What if inflammation is actually a secondary symptom?

This is where most of the confusion lies in the medical community. While it might not seem like a big deal (pain is pain, right?) – it’s a problem if you keep getting cortisone shots when you don’t actually need them.

Why?

Well overuse of cortisone shots can cause degeneration of your tendons and joint structures. So you only want to get one when you know: 1) it’s going to help and 2) if it’s necessary.

But how do you know? The key is in understanding the source of your pain. With chemical sources of pain, the source is inflammation and a cortisone shot is a good idea. But when it comes to mechanical pain, inflammation may exist but it’s not the source of your shoulder problem. In these cases, cortisone is either not helpful – or worse – it “works” but then masks your problem, sometimes for years.  

Let’s talk about the two sources of Shoulder pain to help you understand.


“Chemical Pain”

Chemical pain is the result of your body’s natural inflammatory response to injury. It’s a complex chemical reaction that occurs after tissue damage that involves the releasing of chemicals from your blood and other cells to “flush out” the area and start the healing process.

A good example of this is when you fall and sprain something. The sprain causes temporary tissue damage so your body creates inflammation to heal it. Normally this process only lasts a few days, your pain subsides, and you’re back to normal in no time. But sometimes this inflammatory process lingers longer than it should.

For various reasons the accumulation of toxic chemicals sticks around and the result is constant irritation to the nerves and surrounding tissues. Constant, dull pain, even at rest, that tends to be very sensitive to any and all movement is often a tell-tale sign that you’re dealing with pain that is chemical in nature. In this case, a cortisone injection could be a good course of action for you.

“Mechanical Pain”

Mechanical pain does not need a cortisone shot and it won’t respond well to it. The hallmark sign of mechanical pain is that your pain will come and go based on certain activities, movements, or positions. It’s not constant and throbbing like with chemical pain. Eighty percent of all musculoskeletal problems – including shoulder pain – are mechanical in nature.

Now, the real problem is that whether or not your pain is mechanical, a cortisone shot often does take away your pain. Not only is this confusing – but many people question why they should even be concerned about this. Well – when the pain and inflammation you’re experiencing is secondary – which is often the case with mechanical pain.

 You never actually treat the true source of your shoulder pain when you “cover it up” with a cortisone shot.

For example, you might have an irritated rotator cuff tendon or arthritis that is exacerbated because of poor posture or immobility in your shoulder joint. If you inject cortisone into your tendon or joint, the pain will likely be relieved. But this will only be temporary. It’s only a matter of time before your poor posture and movement habits cause irritation and pain again. This is the vicious cycle I see a lot of folks get themselves into. You risk never fixing the real problem. And irreversible damage to your tendon that might eventually need to be fixed surgically. 

Moral of this story… don’t rush to get a cortisone shot just because you’ve been told you have inflammation.

You must figure out the source of your inflammation first. Cortisone shots are not necessary if your pain is mechanical in nature. And it might actually prolong your problem. If your pain comes and goes, or you have good days and bad days, this is a classic sign that your pain is likely coming from a mechanical source.

Your best course of action is to work with someone who understands and specializes in this. I’ve seen many cases where getting a cortisone shot provides a false sense of hope, and as a consequence, delays quality treatment that you should be getting instead. 

Are you local to Portsmouth, NH?

Request to speak to one of my specialists to see if we would be the right fit to help you get out of pain. CLICK HERE to request a Free Discovery with one of my specialists.

If you can’t wait for the call  – get our free guide to neck and shoulder pain now. 

This totally free guide – written by leading back pain specialist, physical therapist, and movement expert, Dr. Carrie Jose – reveals seven easy ways (plus a bonus section!) that are PROVEN to help you ease neck and shoulder pain quickly – without pain medication, procedures, or surgery.

Click here to download the guide!

Dr. Carrie Jose, Physical Therapist and Pilates expert, owns CJ Physical Therapy & Pilates in Portsmouth and writes for Seacoast Media Group. To get in touch email her at [email protected] or call 603-605-0402

Neck Pain

Tech neck: What it is and How to Cure it

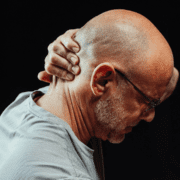
Tech neck – also known as text neck – is a commonly used term to describe neck pain that results from overuse of various electronic devices. If you’re looking down at your cell phone or iPad too much, or sitting in front of your computer too long – and you feel pain in your neck – you are likely suffering from tech neck.

So what’s the big deal? Is this even a real syndrome?

I’ll be honest. I had my doubts at first. I’ve been a physical therapist for 20 years and when I first heard this term I thought it was a joke. But over the last 12-15 years I’ve seen more and more cases pop up and I can tell you with certainty that tech neck is, indeed, a real problem for people.

Tech neck – when allowed to go unaddressed – can result in headaches, tension into your upper shoulders, or even pain and tingling into your arms and hands.

The good news – it’s not only entirely possible to get rid of it – but you can learn how to prevent it all together.

So what can you do about tech neck? Here are three simple tips:

1. Be mindful of your posture

When you’re constantly looking down or hunching forward – it eventually wreaks havoc on your neck. Being mindful of your posture is not only the number one way to cure tech neck – but it’s the best way to prevent it.

The biggest problem with poor posture is that you don’t know it’s a problem until it’s too late. Postural problems take a lot of time to reveal themselves. The changes in your soft tissue and the wear and tear on your spinal joints that occur from being positioned poorly and repeatedly don’t happen overnight – and you rarely notice them when they are first happening.

Truth be told, “bad posture” on occasion is not bad for you and should not cause you any major problems. Poor posture all the time is where you get in trouble. That’s why simply being mindful of how you’re positioned when using your favorite electronic devices can go a long way.

2. Use headphones

Our spines crave movement but also alignment. But we don’t want alignment at the expense of other joints – namely – our shoulders. It’s not always comfortable to hold your phone or iPad in front of your face – which is what you need to do if you want to maintain optimal neck alignment when using your device. While great for your neck – this position can cause strain and tension in your upper shoulders.

For this reason I highly recommend using headphones. Especially wireless headphones. This allows you to keep your phone or iPad on your desk while freely sitting upright and talking. Headphones also allow you to use the speak to text feature quite easily so you don’t have to strain your thumbs or shoulders when talking to your friends, kids, or grandkids.

3. Interrupt your sitting and standing

Prolonged posture in any form is not great for you. Our bodies – especially our spines – crave movement. We hear a lot about the detrimental effects of sitting all the time – but standing all the time isn’t great either. When it comes to sitting, your lower back tends to hunch over time which forces your neck into that “forward head” posture when you’ve been sitting for more than 20 min or so. When you add an electronic device to the mix the effects are even worse.

Because of this – standing desks have become much more common over the past few years. But I see folks having problems from standing too long also. If you don’t have great core engagement, for example, which is important when you’re standing for prolonged periods, you might hold tension in your jaw or neck to compensate. This can create unwanted tension and stiffness in your neck muscles.

How do you combat all this?

Simply interrupt your position. Try not to stay sitting – or standing – longer than 30 min at one time. Your body – and especially your neck – will thank you.

Recognizing tech neck early is crucial and if you catch it in time – it’s very easy to cure on your own.

The problem is that it’s something that tends to creep up over time and not addressed until it’s too late. If you’re suffering from chronic headaches, or symptoms down your arms or into your hands – the tips I’ve given you here may not be enough to address the problem.

Don’t worry – you can still get help with these symptoms naturally and without pills and procedures – you will likely need some expert help.

Talk to someone who understands posture and the importance of healthy movement in your spine – they are the best people to help you cure and prevent tech neck.

Local to Portsmouth, NH?

Consider talking to one of our specialists free. They’ll let you know if you’re a good fit for what we do and get you on our schedule as quickly as possible! CLICK HERE to request a free Discovery Call with someone from my client success team.

Carrie Jose, Physical Therapist and Pilates expert, owns CJ Physical Therapy & Pilates in Portsmouth, NH.  To get a free copy of her guide to taking care of back pain – click here.

tendinosis

The Number One Reason your Shoulder Pain isn’t Going Away

Statistics show that shoulder pain impacts approximately 15.4% of men and 24.9% of women. The prevalence of shoulder pain also tends to increase and become more severe as we age, especially for folks in their 50’s.

There are many reasons why we get shoulder pain. It’s the most mobile joint in your body, making it more susceptible to injury. But why – for some – does it seem to just linger and not go away?

The number one reason is mis-diagnosis. Here are a few examples of what that looks like.

  • Your MRI says you have a rotator cuff tear – so you get surgery – yet the pain comes back or doesn’t fully resolve like they told you it would.
  • You’re told you have impingement syndrome – so you get arthroscopic decompression surgery – no success.
  • Perhaps you’ve been told you have tendonitis in your shoulder and need a cortisone shot – followed by physical therapy. Nope, that didn’t work either.

When it comes to shoulder pain, it’s critical that you know for certain the pain in your shoulder is actually coming from your shoulder. If not, you’re going to waste your time fixing the wrong problem and are more likely to get an unnecessary procedure or surgery. 

So – if your shoulder pain isn’t coming from your shoulder – then where is it coming from? 

The most common culprit is your neck or mid-back. In fact, studies have shown that 40% of the time extremity pain (including shoulder pain) comes from a source in your spine – even when you don’t feel any pain in your spine. 

Here are a few key signs and considerations to help you figure out if your shoulder pain has been misdiagnosed:

1. Where is your pain located?

When your pain is coming from your shoulder, the pain will be localized to your shoulder joint. True shoulder pain is felt directly in front of your shoulder, on top of your shoulder, or in a more involved shoulder problem (like a rotator cuff injury) you might feel some achiness down the side of your arm. But it will never go below your elbow. If the pain goes past your elbow and into your forearm or hand, or radiates above your shoulder into your neck (the upper trap area), or if you feel pain deep inside of your shoulder blade into your mid-back – odds are pretty good that you’re dealing with a spine problem and not a shoulder problem. 

2. Do your symptoms involve numbness, tingling or burning?

These are signs of nerve compression or irritation. If that’s happening – it’s likely coming from your neck – and could be due to something like a bulging disc – or a restricted/faulty movement pattern that is irritating nerve roots in your neck. You might feel symptoms in your shoulder, shoulder blade, or even down into your arm. What’s particularly misleading is that it’s entirely possible to feel all these nerve symptoms in your shoulder or arm – and not actually feel anything in your neck. If you’ve got more pain in your arm than you do your shoulder, be sure to get your neck fully checked out. This is a huge area of mis-diagnosis for those suffering with long-standing shoulder pain.

3. How is your posture?

Poor posture can wreak havoc on your shoulder joint – without you even knowing it. If you’ve got a really curved middle back, combined with a “forward head” posture, you’re just setting your shoulder up for failure. Chronic, poor posture will crowd the tendons and structures in your shoulder joint over time. Every time you raise your arm overhead, or try to lift something with an outstretched arm – there will be implications if you’ve got poor posture.

The tricky part about this scenario is that you really will have pain in your shoulder. You’ll have wear and tear of your rotator cuff, and you’re more likely to have degeneration in your shoulder joint that might cause it to feel weak. The confusion here is that the shoulder “problems” are actually symptoms. The real cause is your posture and it’s either been missed or not addressed. The good news is that if you address your posture, most of these “wear and tear” shoulder problems will go away naturally, and you can avoid unnecessary procedures and surgery. This problem flies so under the radar that it’s overlooked all the time.

If you’ve got a true shoulder problem and it’s been diagnosed correctly – it should go away with proper treatment.

If that’s not happening, it’s worth considering that the true source of your shoulder pain has been missed. Start by getting a thorough check of your spine.

Don’t know where to start?

You can request a free Discovery Call with someone from my client success team. They’ll let you know if we can help – tell you if you’re a good fit for what we do – and get you on your way to living pain free. CLICK HERE to request a free Discovery Call.

Carrie Jose, Physical Therapist and Pilates expert, owns CJ Physical Therapy & Pilates in Portsmouth, NH.  To get a free copy of her guide to taking care of back pain – click here.

Traveling

4 Tips to Avoid Neck and Back Pain When Traveling

4 Tips to Avoid Neck and Back Pain When Traveling

Memorial Day weekend is the “unofficial” start of summer – and AAA estimates that 39.2 million people will travel this weekend. That’s 8.3% more than last year, and it’s going to mean the exacerbation of neck and back pain for a lot of folks out there – especially the over 40 crowd.

So why does traveling wreak such havoc on our spines? 

Road trips, planes and trains typically involve lots of sitting and driving, which necks and backs just don’t like when done frequently and for prolonged periods. You’re typically off your routine when you travel, and sleep on surfaces you’re not accustomed to.  Any one of these things – but especially when combined together – can flare up old patterns of neck and back pain.

The good news is there are lots of things you can do when traveling to ease neck and back pain. Here are 4 of my top tips:


1. Use the 30 Min. Rule

The biggest strain on your body while traveling is undoubtedly the prolonged periods of sitting – often in cramped spaces. Our bodies are made to move continuously throughout the day. Whenever possible, getting out of your seat often is critical for keeping your neck and back healthy and mobile. Motion is lotion. And one of the best things you can do for your neck and back is to interrupt any prolonged posture – especially sitting – once every 30 min. If you’re unable to actually stand for a few seconds, then try arching your back or stretching your arms up over your head while sitting. Do a few neck rolls and chin tucks to stretch your spine. The more you move, the better your spine is going to feel.

2. Use a Lumbar Roll

Our spine is made up of distinct curves for a very good reason. They are designed to balance forces and sustain shock – and it’s best if you can maintain them. When you sit, the curve in your lower back (lumbar spine) decreases, or sometimes disappears all together, when not supported. While it’s perfectly acceptable to sit like this for small increments of time, it will start to cause problems after several hours. Prolonged curvature of your low back puts unwanted stress on the discs, ligaments, and muscles in your spine.

Your neck also responds to this posture by assuming a position we call “forward head”. This can give you headaches, neck pain, and cause extra tension to occur in your mid back and upper shoulders. One of the best things you can do is use a cylindrical lumbar roll to help maintain the natural curve in your low back. If you’re driving, the lumbar support in your seat usually isn’t enough. Take a small towel roll, sweatshirt, or pillow and place it at the small of your back any time you’re sitting. You’ll find it’s easier to maintain the natural curves in your spine – and you’ll have a lot less strain on your neck and back.

3. Bring your own pillow

Sleeping on surfaces we’re not accustomed to can not only ruin a vacation but set us up for unwanted neck and back pain. If possible – bring your favorite pillow from home – or ask for extra pillows wherever you’re staying. If a mattress is too firm for you – you can use pillows to cushion areas of your body like hips and shoulders so that you don’t wake up sore. Conversely, if a mattress is too soft, you can use extra pillows to build up the surface under your waist if you’re a side sleeper, under the small of your back if you’re a back sleeper, and under your belly if you’re a stomach sleeper.

Lastly, if a pillow is too fluffy or too flat – your neck will end up paying for it. When you’re sleeping – the goal is to position yourself in a way that allows your spine to stay in neutral alignment. You don’t want your head tilted down or up – it’s the fastest way to stir up an old neck injury or wake up with a tension headache.

4. Extend instead of bend

Did you know that the average person bends or flexes forward between three and five thousand times per day? When you’re traveling – you’re going to be on the upper end of that metric. Our spines crave balance. And because of the disproportionate amount of time we spend bent over – we need to make a concerted effort to move our spines in the opposite direction. When you’re traveling – look for opportunities to be upright and mobile.

Walking is an excellent, therapeutic activity for your spine – plus – it’s a great way to see the sights wherever you’re going. When you’re practicing the 30 min rule, give your back and neck a nice stretch backwards each time you stand to interrupt your sitting. But probably more important than what you do during travel is what you do when you’re back home. Be cautious when jumping back into your typical gym or exercise routine. All the sitting and bending that comes with travel makes your spine vulnerable for injury. It’s very common to get injured a week or two after you’re home – seemingly “out of nowhere”.


Looking for more help with your neck and back pain?

Sign up for a FREE Discovery Session today to speak with my client success team to see if we can help you get rid of your neck and back pain for good.

Carrie Jose, Physical Therapist and Pilates expert, owns CJ Physical Therapy & Pilates in Portsmouth, NH.  To get a free copy of her guide to taking care of back pain – click here.

Hip Flexors Always Tight? Maybe stop stretching.

When it comes to chronically stiff muscles – tight hip flexors are the second most common complaint I hear after tight hamstrings. Tight hip flexors are annoying, achy, and they often contribute to lower back pain. When your hips are always tight, it can interfere with your ability to enjoy walking, running, golfing, and just exercise in general.

Typically – the recommended treatment for tight hip flexors is to stretch – right along with advice to foam roll and massage. But what do you do when none of that works? What if no matter how often you stretch, the tightness just keeps coming back?

First, you need to make sure that the tightness you feel in your hips is actually due to tight hip flexors. Just because your muscles feel tight – doesn’t mean they are tight. 

Let me explain.

Your hip flexors (or any muscle for that matter) can feel tight for different reasons. They can literally be shortened and constricted – in which case – they need stretching – and lots of it. But they can also feel tight due to weakness or being overworked. If your hip flexors are weak, they are going to feel strained when you use them, which can create a sensation of tightness. If your hip flexors are compensating for another underperforming muscle group – say your deep core – then a sensation of tightness may occur because they are simply tired and overworked.

So the first and most important thing you need to figure out is what is causing the sensation of tightness in your hips. Are they actually short and tight? Are they weak? Or do they simply need a break?

Let’s do a quick anatomy review of your hip flexors to help you figure this out…

Your hip flexors consist of the muscle group located in the front of your hip and groin. They are responsible for bending (flexing) your thigh up and toward your chest. But they also play a role in stabilizing your pelvis and lower back – and this is where I see a lot of problems and confusion. The rectus femoris, part of your quadriceps muscle group, and your psoas, part of your deep abdominal muscle group, are the two major hip flexors. Your rectus muscle is the one primarily responsible for lifting (flexing) your thigh. When you are walking or running, and repetitively flexing your leg, this is the muscle primarily at play. Your psoas, on the other hand, is much shorter and has a connection to your lower back. Because of this, it has more of a stability role. When functioning properly, it will assist in exercises like the crunch or sit up, and also work alongside your deep abdominals and glute muscles to help you have good upright posture when you’re sitting or standing.

Let’s talk about the psoas for a moment, because this is where many folks I speak with are misinformed. The psoas gets blamed for a lot of things – most notably – tilting your pelvis forward and being the cause of low back pain. The theory is that if you stretch, massage, and “release” your psoas muscle, then you will balance out your pelvis and your back pain will disappear. Sadly, this is rarely the case. Most of the time, your psoas feels tight because it’s either too weak and not able to keep up with what it’s being tasked to do, or it’s overworking to compensate for your deep abdominals not working properly. Either way, the result will be an angry psoas that retaliates against you by feeling tight and achy. And stretching it over and over again will simply not work.

Now sometimes your hip flexors – particularly your rectus femoris – can get deconditioned from not being used enough – and this can result in actual constriction of your muscle tissue. This typically happens slowly over time, and is more likely to occur if you sit too much and aren’t very active. In this case, you actually do need stretching to fix the problem – but one of the reasons it doesn’t work – is because you aren’t doing it properly. When your muscle tissue is actually constricted – it requires a very specific stretching protocol to work. The days of holding a stretch for 30 sec and repeating it 3x are long over. If your muscle fibers have actually become constricted – the only way for them to improve their length is to remodel. They need a lot of stress to remodel (aka get longer) and the only way to accomplish this is to stretch repeatedly and often.

At the end of the day, if you’ve got chronically tight hip flexors and you’re stretching all the time, you’re either doing it wrong or shouldn’t be doing it at all. Perhaps you need to strengthen your hip flexors so they don’t feel so tense all the time? Or maybe your core isn’t kicking in and you need to strengthen that instead? Don’t stress yourself trying to figure it out on your own.

Talk to an expert who gets this.

Stretching a muscle that feels tight isn’t always your answer, and you’ll know this because stretching over and over just isn’t fixing the problem. 

Request to speak to one of my specialists to see if we are the right fit to help get to the root cause of your tight hip flexors. CLICK HERE to request a Free Discovery.

Dr. Carrie Jose, Physical Therapist and Pilates expert, owns CJ Physical Therapy & Pilates in Portsmouth, NH.  To get a free copy of her guide to taking care of back pain – click here.

Avoiding Radiofrequency Ablation in Your Back – Success Story

Have you heard of Radiofrequency ablation (RFA)?

If you suffer from chronic back pain – there’s a good chance you have. Perhaps it’s even been recommended to you?

It’s a common procedure used to disable nerve fibers that are carrying the pain signal to your brain.

Your brain is what decides whether or not you’re going to experience pain. So the goal behind this procedure is to kill (or in this case burn) the “middle man” – the nerve that is responsible for signaling the pain trigger. An electrical impulse is transmitted through a needle that is designed to burn the nerve endings responsible for your pain.

If it works – the results last anywhere from 6 months to a year – but they typically aren’t permanent.

Most of the people I talk to who rely on this for pain relief have to go back at least once per year or more.

But in some cases… the procedure eventually stops working all together…

And then what?

Well… you’ve usually got just two choices…

  1. Live with it
  2. Get surgery

The good news?

You don’t have to accept either of these options and you don’t even have to rely on this procedure at all if you don’t want to.

How do I know?

Because 80% of all spinal pain is mechanical in nature – which means it’s due to poor or insufficient movement habits. These habits – over time – result in compensatory strategies in your body. These compensatory strategies eventually lead to “pissed-off” muscles, ligaments, or nerves – which result in pain.

So you see…

Getting a procedure like RFA is really only a bandaid.

Why not find out what compensatory strategy might be happening in your body – and from there – what caused it to begin with?

That’s what we prefer to do and I’m excited to tell you about a recent success story where this actually happened…

I was re-evaluating one of our patients (“L”) this week and even though she is still working through some back pain – it’s nothing like when we first began working together.

When we first met – she couldn’t walk very far without back pain and she didn’t even think about getting on a bike. (Biking, hiking, and staying active are things she LOVES to do for herself and with her husband)

When we spoke this week – she was not only walking – but starting to do some trail walking – and she was using her bike trainer at home regularly – all with minimal or no back pain. The next step for her is to get on the road with her bike – we have a goal of her riding 30-50 miles!

I am confident we’ll get there 🙂

But the most important part of this ongoing success story that I want to share is this…

“L” told me that the most valuable accomplishment from working with us so far is that she hasn’t had to return for any RFA!

I almost cried when I heard this… not even remotely exaggerating…

Because not everyone has the courage to see a program through and trust in the process.

But “L” did – and I’m so proud of her for it.

She said one of her goals was to not need this procedure anymore…

I’m excited to say that as of today – she’s officially far past the point when she would normally have returned for her RFA procedure.

And it’s because of our program!

The biggest motivator behind everything I do – every email or article I write – is to empower you.

My mission behind CJPT & Pilates is empowerment by education.

We aim to give you all the information you need so you can make the best decisions for your health – and hopefully those decisions involve less pills, less procedures, and certainly not surgery 🙂

I wanted to share this story with you because it is a perfect example of just that.

Yes – “L” still has back pain – but it’s progressing and we’re working through it – but on her terms and not on the procedure/RFA’s terms.

If you want more details on how we helped “L” work through her chronic back pain and avoid procedures like RFA…

CLICK HERE to talk to someone on my Client Success Team to see if we are a good fit to help you avoid RFA.

Ready to get rid of your back pain? Lucky for you we have a totally FREE guide written by leading back pain specialist, physical therapist, and movement expert, Dr. Carrie Jose! CLICK HERE  to read her BEST tips and advice on how to start easing back pain and stiffness right away!