Tight Hamstrings: a Case Study

If you’ve ever felt tightness in your hamstrings, the typical advice you get from friends, family, and even well-meaning health and wellness professionals is to stretch them.

Well… if it’s just your hamstring that’s actually tight then this might be good advice to follow.

But what if it’s something else?

If you accidentally stretch a hamstring that feels “tight” due to a back problem – there is a very good chance you’ll make your condition worse.

This exact scenario happened to a recent client of ours (we’ll call him “Jack”) who came to us with what he thought was a “hamstring strain.”

Jack had been stretching and stretching his hamstrings – which he had been told to do by his chiropractor – but he wasn’t feeling any looser. In fact, his hamstring even started to hurt the more he stretched, so he thought maybe he caused himself a strain.

Was he doing too many stretches? Or perhaps doing them incorrectly?

He made the smart decision to call us for help and came in for an examination.

And the first thing we asked him was…

“Where is your pain?”

Jack pointed to the back of his leg, but when he started describing his symptoms… it turned out they actually started in his butt, traveled down the back of his thigh, and stopped at his knee. But on occasion he’d also feel the tightness in his calf. And since doing all that hamstring stretching, he was even starting to feel pain!

Lesson number 1:

Your hamstring starts at your ischial tuberosity – otherwise known as your “sit bone” – and extends down to just below your knee. Since muscles and joints can’t actually refer symptoms (only nerves and sometimes fascia can do that), feeling pain or tightness anywhere other than your actual hamstring is the very first clue you could be dealing with something other than a hamstring problem.

Since Jack was feeling symptoms in his butt and also down into his calf, we knew immediately that “hamstring strain” was NOT Jack’s problem.

The next step was to figure out where his tightness was coming from.

Lesson number 2:

Since he’d been stretching for several weeks already and was starting to feel more problems in his leg – the likely explanation was that it was coming from his back.

While yesm over-stretching can make you sore, and yes, stretching incorrectly can cause you discomfort… that wasn’t the case with Jack. He was still feeling tight, and now on top of that he was dealing with pain.

All signs were pointing to a problem in his back.

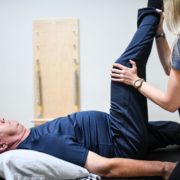
Well now that we had our theory – it was time to test it!

After performing several movement tests with Jack’s back, we were able to produce the exact same tightness AND pain he had been feeling in his leg. And with some different movement tests we were actually able to ELIMINATE his symptoms temporarily.

Since moving his spine in certain directions was responsible for both turning “on” AND turning “off” his leg symptoms, we were able to confirm that he had a back problem – not a hamstring problem.

Pretty cool – right?

Jack thought so… but more importantly… he was glad to finally have some answers! Finally, he had a plan to move forward.

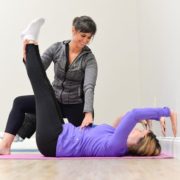
  1. He stopped stretching his hamstring.
  2. He started doing a different – and properly prescribed movement instead – that was designed to eliminate the symptoms in his leg.

We’ll of course need to continue working with Jack to make sure that his leg symptoms not only go away – but that they stay gone. Part of the process will be teaching Jack how to do this on his own in case the problem ever comes back again.

Sadly, I can’t tell you how many times I’ve seen a case like Jack’s in my office.

Lucky for Jack, he came to us early on – when his symptoms were mild. Basically, the nerves in Jack’s spine were starting to get irritated, and the result was a “tight” feeling in his hamstring. Nerves don’t like to be stretched, so Jack was actually making his problem worse by stretching and he didn’t even know it. Had he not gotten this addressed – the tightness in his leg could have progressed into full blown sciatica!

If you have any kind of ache or pain that isn’t going away on it’s own with natural movement or stretching – don’t try to figure it out on your own.

And as you learned from Jack’s case – not all movements are created equal. It’s possible you could look up a stretch on Google or YouTube and actually make yourself worse!

Don’t guess… TEST 🙂

And when it comes to pain during movement or certain activities – let the movement experts be the ones to test you and figure it out. All you have to do is click here to schedule a FREE, no-obligation consultation with one of our specialists! These Discovery Sessions are your chance to determine where your pain, tightness, or stiffness may be coming from and if we’re the right people to help fix it.

avoid back pain when raking leaves

5 Tips to Avoid Back Pain While Raking Leaves

Fall is officially in full swing here in New England. But as much as we love leaf peeping, leaf raking is turning into a literal pain! As more and more people start their fall clean ups over the next few weeks, we fully expect to be getting more calls and complaints in our office about back pain.

Here are 5 tips (plus a bonus tip!) to help you avoid back pain while raking leaves.

1. Warm up

Crisp, cool fall weather is perfect for walking. Before you start any activity, never mind a repetitive one like raking leaves, it’s a good idea to warm up your body first. Walking is an easy and practical way to get your legs, arms, and spine moving so that your joints feel lubricated and loose ahead of all that yard work.

2. Plan for stretch breaks

The biggest “danger” to your back when it comes to raking leaves is its repetitive nature — specifically the frequent bending of your spine. Our spines were designed to hold us upright, not to bend over and over again in the same direction. One of the simplest ways to protect your back while raking leaves, or any other repetitive activity, is to take quick and frequent rest periods to stretch the opposite way. Stand up tall and stretch backwards. Many of us do this instinctively, but typically not often enough. Best practice is to do this once or twice every 30 min. Your back will thank you.

3. Use your core

You don’t need six-pack abs to prevent back pain while raking leaves, but being mindful of your core can be super beneficial and never hurts. Most back injuries occur when you least expect it… coughing, sneezing, picking something light off the floor. These activities are so mindless and automatic you’re not paying attention to your body or what it’s doing. The same thing can happen when you’re repetitively raking leaves. Each time you pull the rake toward you, think about engaging your abs and bracing your core. This will help keep your spine in a more supported and stable position while bent over. We help people in our office learn to engage and be more mindful of their core all the time. They are surprised at how beneficial this simple tip can be for them with all activities, not just raking leaves.

4. Bend with your knees and hips

After all the raking is done, you’ve got to pick up your leaves. It’s a good idea to be extra mindful of your posture here, especially because you’re more tired and fatigued at this point. The best way to pick anything up (not just leaves) is by squatting and using your legs. The perfect squat starts with your hips. Hinge back at your hips and bring yourself closer to the ground by bending your knees, not your spine. Once you’re in your squat, scoop up the leaves with your arms and use your legs and buttocks to stand upright. Even though the leaves aren’t heavy, this is a good habit to become proficient at. Remember that back pain almost always happens when you’re least expecting it, even picking up something light like a bunch of leaves.

5. Use a leaf blower

This is probably the best way to avoid all the repetitive bending that occurs with traditional leaf raking. However, you still want to be mindful of all the tips I just mentioned. Since it’s hard to stand perfectly upright when you’re blowing leaves, you want to be mindful of your core, take quick stretch breaks, and watch your posture. Holding the leaf blower for prolonged periods can also be quite strenuous on your neck, but all of these tips can help with that too!

Oh – and one more BONUS TIP…

What you do after raking is equally as important as what you do during to help prevent back pain.

One of the biggest mistakes people make after a repetitive or strenuous activity (like raking) is to slump on the couch or recliner and rest. This is one of the worst things you can do to your spine because it’s more pliable and vulnerable after strenuous activity. When you put yourself in a relaxed and sustained bending position – after all that repetitive bending – it can be the icing on the cake. You go to stand up and BOOM – there goes your back. I see it all the time. Do yourself a favor and go for another walk after raking to cool down, and be mindful of the posture you rest in after all that hard work.

To learn more about back pain and how to prevent it, you can download our FREE back pain guide right here! Hopefully these tips give you a few things to think about before you go raking, and most importantly, avoid unwanted back pain so you can enjoy this beautiful fall season.


Neck stretches

Neck Pain During Crunches? Here’s Why & How to Avoid it

Abdominal crunches are one of the most popular “ab exercises” around. It’s a movement that emphasizes upper abdominal strength. You start by lying on your back, typically with your hands behind your head and knees bent. You then lift your head and chest off the floor, “crunching” your upper body into a C-shaped curve.

Over the years, many “experts” have dismissed this exercise, claiming it’s ineffective for core strengthening. While I agree that it shouldn’t be the ONLY core exercise you do — the crunch does have its place. I work on this a lot with my private clients, because it’s a functional move that when done correctly, will help you sit up from the floor with more ease and with less risk of injury. And of course you see variations on this movement all the time in Pilates, which is a key part of our practice and our efforts to help people recover from back pain.

I often hear that people don’t like crunches because they’re uncomfortable or hurt your neck. But when you’re doing a crunch, you want to make sure you’re feeling it in your abs… NOT in your our neck. Here are the biggest problems I see with crunches and how to tell if it’s a technique problem or a neck problem:

You’re not actually using your abs

This sounds pretty obvious, right? But a lot of people have trouble figuring this out. During our Pilates 101 class this week, one woman experiencing neck pain appeared to be doing the move correctly — but she couldn’t feel it in her abs, only in her neck.

It’s because she was using her neck and chest muscles to curl her upper body into the crunch instead of initiating the move from her belly (abs). My tips to correct this were to pull her lower belly in toward her spine and the front of her ribs down toward her belly button. Then, keeping this shape locked in, use her breath (exhale) to help her initiate and start the curl from her abs.

Sometimes people don’t have the abdominal strength yet to perform a crunch from lying flat. If that’s the case, you won’t be able to do this correctly no matter how well you follow my cues. If you think that’s your problem, place a small pillow under the back of your head. This gives you a head start into the curl. Once your abdominals get stronger, you can try doing the crunch with your head starting from the floor again.

Your neck is in the wrong position

When you’re doing a crunch, you want your neck to be slightly curled (chin toward chest). Most people either curl their neck too much, or not enough. If your chin is touching your chest, you’re curled too much. And if you feel your chin and neck jutting forward toward the ceiling, you’re not curled enough. Either of these positions could lead to neck problems down the line if not corrected.

The ideal position for your neck is to begin with a slight nod of the chin (like you’re nodding “yes”) and then keep it there. The rest of the curling motion will come from contracting your trunk and abs. As you curl up, I recommend keeping your eyes focused on your belly and keeping a tennis ball’s distance between your chin and your chest.

Sometimes your hand and arm position can be what causes your neck to be in the wrong place. If your hands are behind your head, be sure you’re not using them to pull your neck forward. Your head should be gently pressing into your hands and your elbows should be at a 45 degree angle from your body. Your abs do the rest.

You have an underlying neck problem

In our practice, we specialize in neck and back pain. When you’ve got an underlying neck problem, doing crunches isn’t a good idea until the underlying problem is resolved.

Let’s say you have a small bulging disc in your neck that you weren’t aware of or that you thought was fixed. The curled position of your neck during a crunch can exacerbate this problem, even if you are using your abs correctly and following every tip I just mentioned above.

Some clues that you might have an underlying neck problem could be pain that shoots into your shoulder blade or numbness and tingling down your arm. You might experience these symptoms during the movement, or even up to several hours after.

Either way, symptoms like this could be a sign that there is more to your neck pain than simply incorrect crunch-technique or weakness in your abs.

If this is happening, it’s a good idea to get it checked out by a movement/mechanical specialist like the physical therapists in our practice. The good news is that we can help your neck feel better even if you do have a problem like bulging discs — and you can get back to doing crunches again without any neck pain.

You can also check out our FREE guide to neck and shoulder pain right here!

It comes right to your email inbox and explores seven easy ways (plus a bonus section!) that are PROVEN to help you ease neck and shoulder pain quickly – without pain medication, procedures, or surgery.

If you have any additional questions or want a more personalized assessment, sign up for a FREE Discovery Session with us! It’s a quick, no-obligations opportunity for you to see if working with us could be the best decision for your health.

Man getting knee pain treatment

Tight Hip Flexors? When Stretching isn’t Enough…

When it comes to feeling stiff and immobile, tight hip flexors are the second most common complaint I hear – right after tight hamstrings.

Tight hip flexors are annoying, achy, and they often contribute to lower back pain. When your hips are tight, it can be painful or uncomfortable to walk, run, play golf, exercise, and even stand up straight!

Typically, the recommended treatments for this problem include lots of stretching, foam rolling, massage, and myofascial release.

But what if the stretching and all that other stuff doesn’t work?

What if no matter how often you stretch, the tightness just keeps coming back?

Sometimes – actually often – the tightness you feel in your hip flexors (or any other muscle group for that matter) can be due to weakness or overworking of the muscle.

If this is your problem, then no amount of stretching or foam rolling is going to help you.

Stretching and foam rolling will help to temporarily ease the stiffness from an overworking muscle, but it will only be a bandaid until you tackle the root cause.

You need to first identify WHY these muscles are weak or overworking, and THEN figure out the proper exercise and load that will help turn your hip flexors from feeling tight and overworked – to flexible and mobile.

Your hip flexors consist of the muscle group located in the front of your hip in the area of your groin. They are responsible for flexing or bending your thigh up and toward your chest. But they also play a role in stabilizing your pelvis and lower back… and this is where we see a lot of problems and confusion.

The rectus femoris, part of your quadriceps muscle group, and your psoas, part of your deep abdominal muscle group, are the two major hip flexors. Your rectus muscle is the one primarily responsible for lifting your thigh. When you are walking or running, and repetitively flexing your leg, this is the muscle you are using.

Your psoas, on the other hand, is much shorter and actually attaches to your lumbar spine. Because of this, it has more of a stability role. When functioning properly, it will assist in exercises like the crunch or sit up, and it helps to stabilize your pelvis during any of these movements as well as when you are standing upright. Your psoas, abdominals, and glute muscles all have to work together in harmony for you to have good posture.

Let’s talk about the psoas for a moment… because this is where many folks I speak with are misinformed.

The psoas gets blamed for a lot of things – most notably – tilting your pelvis forward and being the cause of low back pain. The theory is that if you stretch, massage, and “release” your psoas muscle – then you will balance out your pelvis and your back pain will disappear.

Sadly – this is rarely the case. Read more